


Oracle Cloud Infrastructure (OCI) Full Stack Disaster Recovery manages the transition of infrastructure, platforms, and applications between OCI regions from around the globe with a single click using OCI Console, CLI, and REST API.
OCI Identity and Access Management (IAM) lets you control who has access to your cloud resources. You can control the type of access a group of users has and which specific resources.
In this blog, we will go through the process of an OCI administrator creating various OCI IAM components like User, Group, Dynamic group, Policy, etc., which are required to use Full Stack DR and other IAM policies required to interact with OCI core services. Refer to OCI IAM documentation to understand more about various IAM components. Finally, we will verify accessing Full Stack DR by logging into the newly created OCI user.
1. Create a user for Full Stack DR
a. Login to the OCI console with administrator credentials and select your home region.
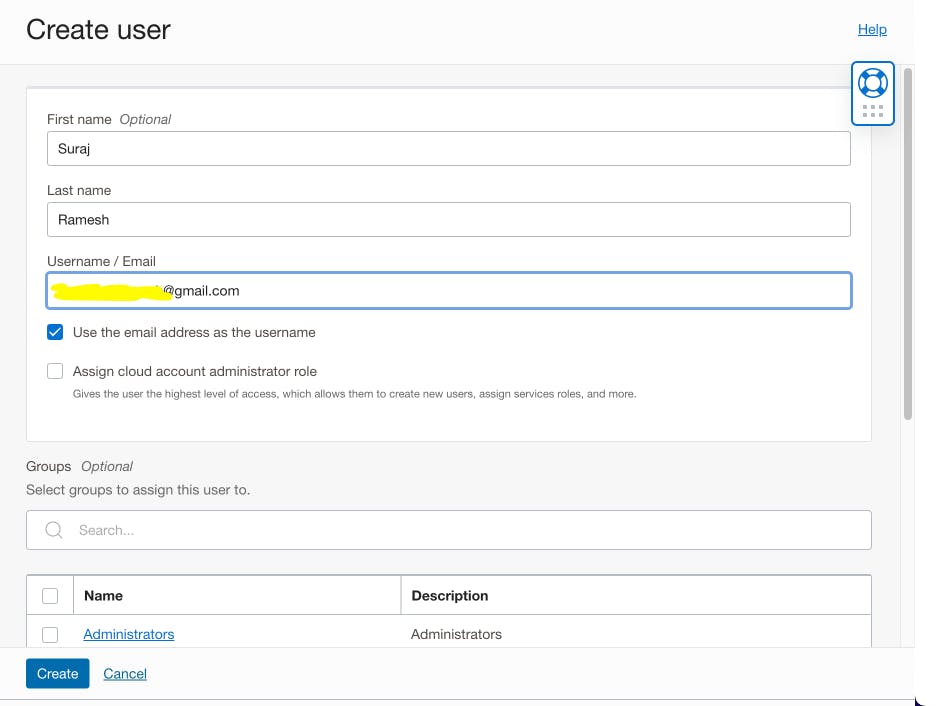
b. From the hamburger menu, navigate to Identity & Security ->Domains-> Default Domain->Users->Create user. Provide First name, Last name, Email id, and Create.
You will get an email (provided above) about activating the user account and must follow the instructions to activate the account.
2. Create a group
a.Login to the OCI console with administrator credentials and select your home region.
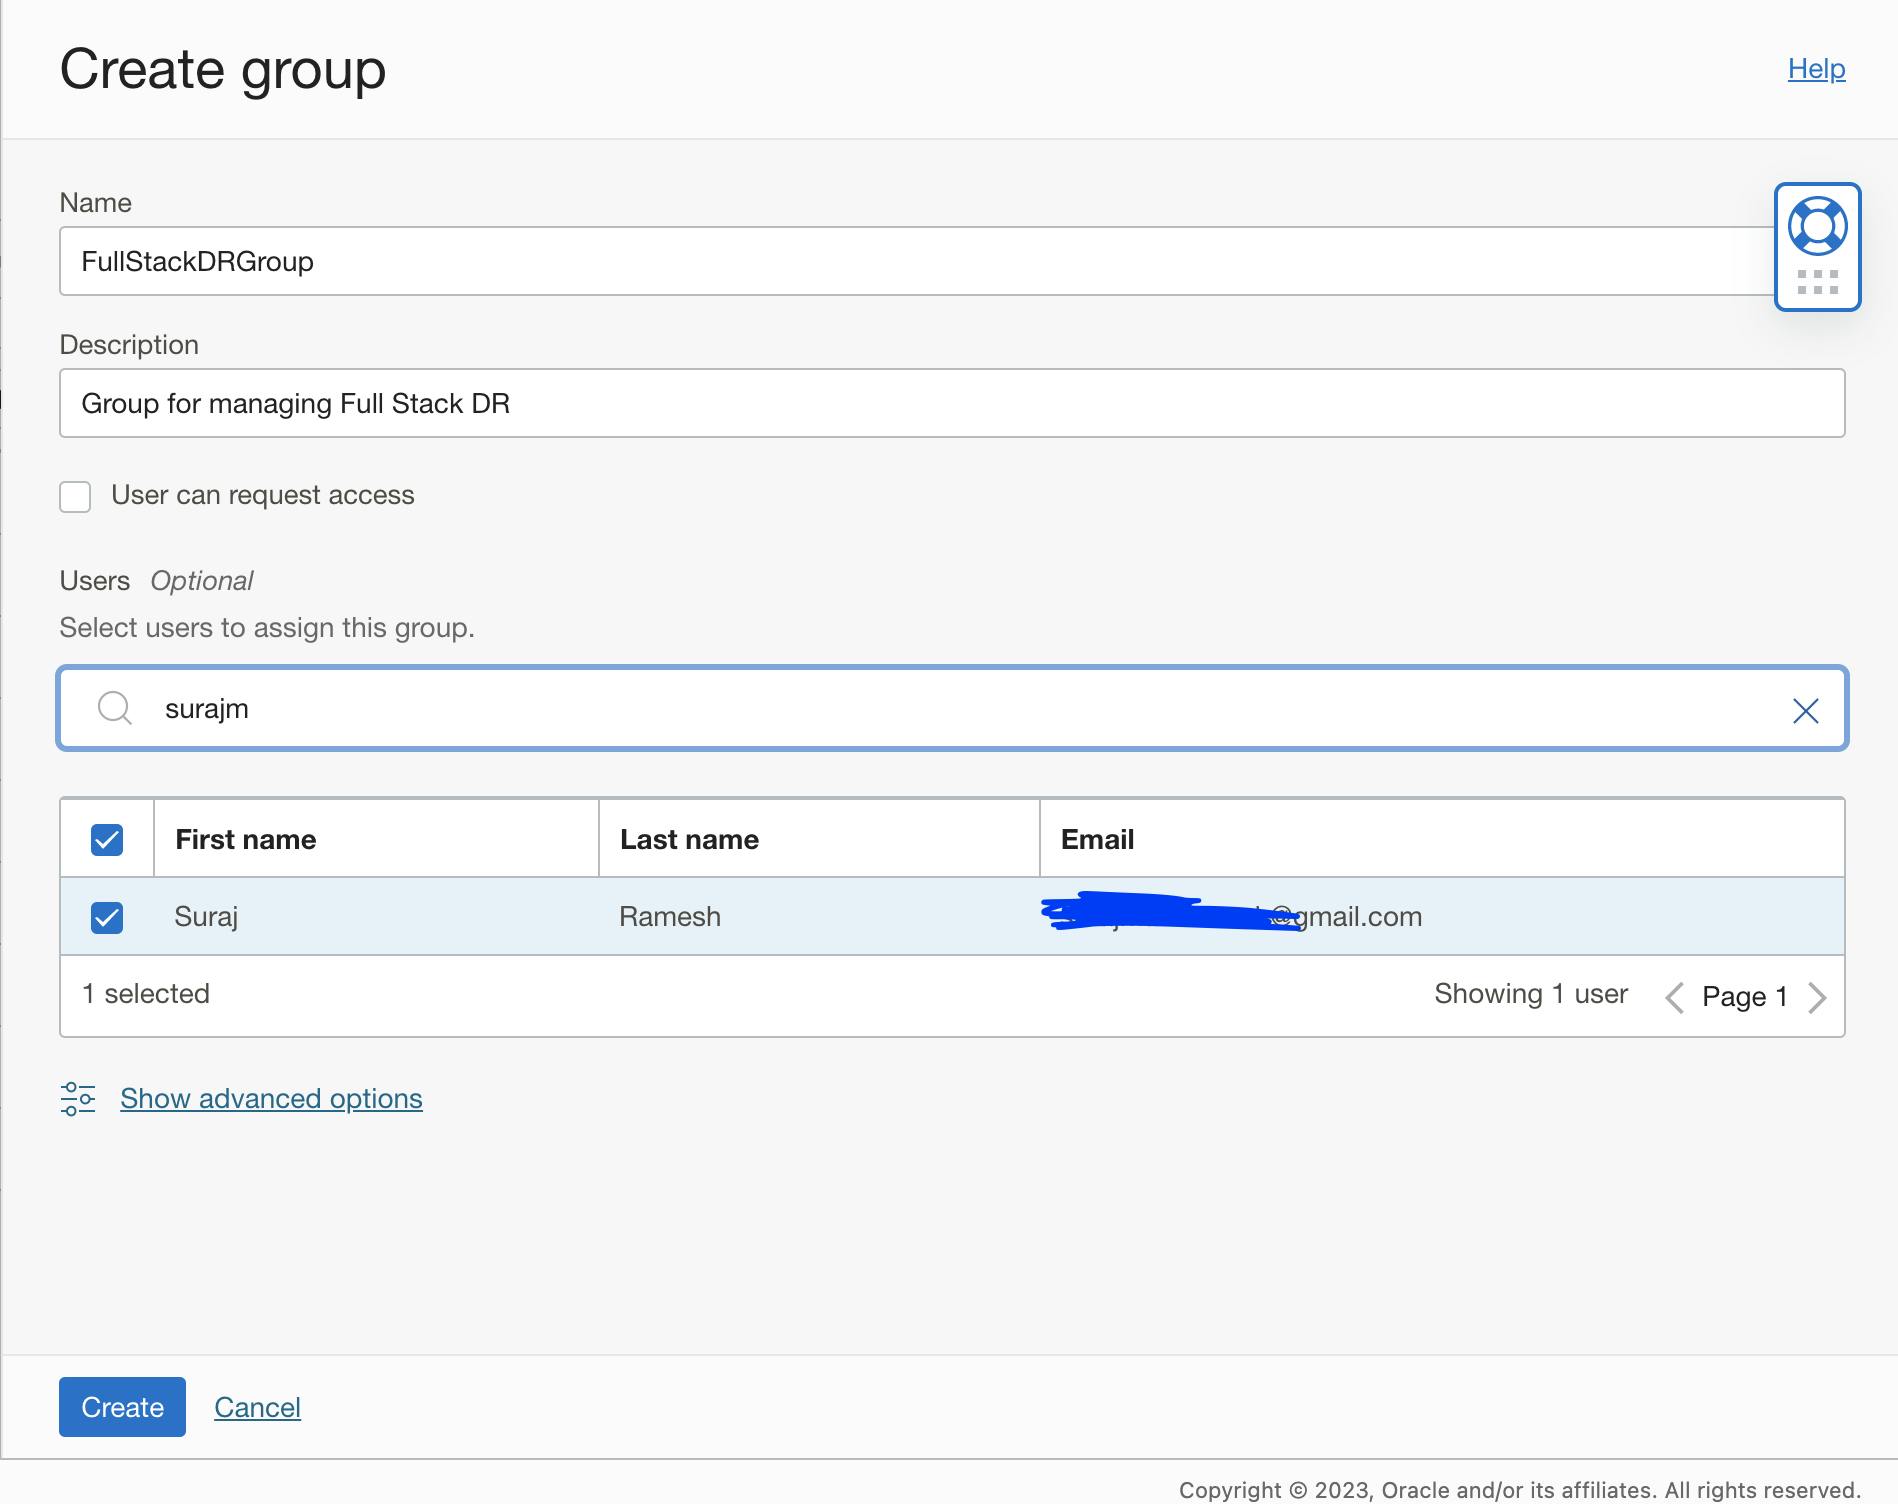
b.From the hamburger menu, navigate to Identity & Security ->Domains-> Default Domain->Groups->Create group. Provide Name, Description, and Select users to assign this group. You should select the User, which you created in Step 1 and Create.
3. Create a policy and provide access to Full Stack DR
a. Login to the OCI console with administrator credentials and select your home region.
b. From the hamburger menu, navigate to Identity & Security -> Policies-> Create Policy. Provide Name, Description, Compartment, Policy Builder enable Show manual editor and add the below Policy
Select the right compartment details where you will create the Policy. In this example, I am selecting compartment "suraj"
Allow group FullStackDRGroup to manage disaster-recovery-family in compartment suraj
You should use the correct group name (created in step 2) and compartment name in the policy syntax.
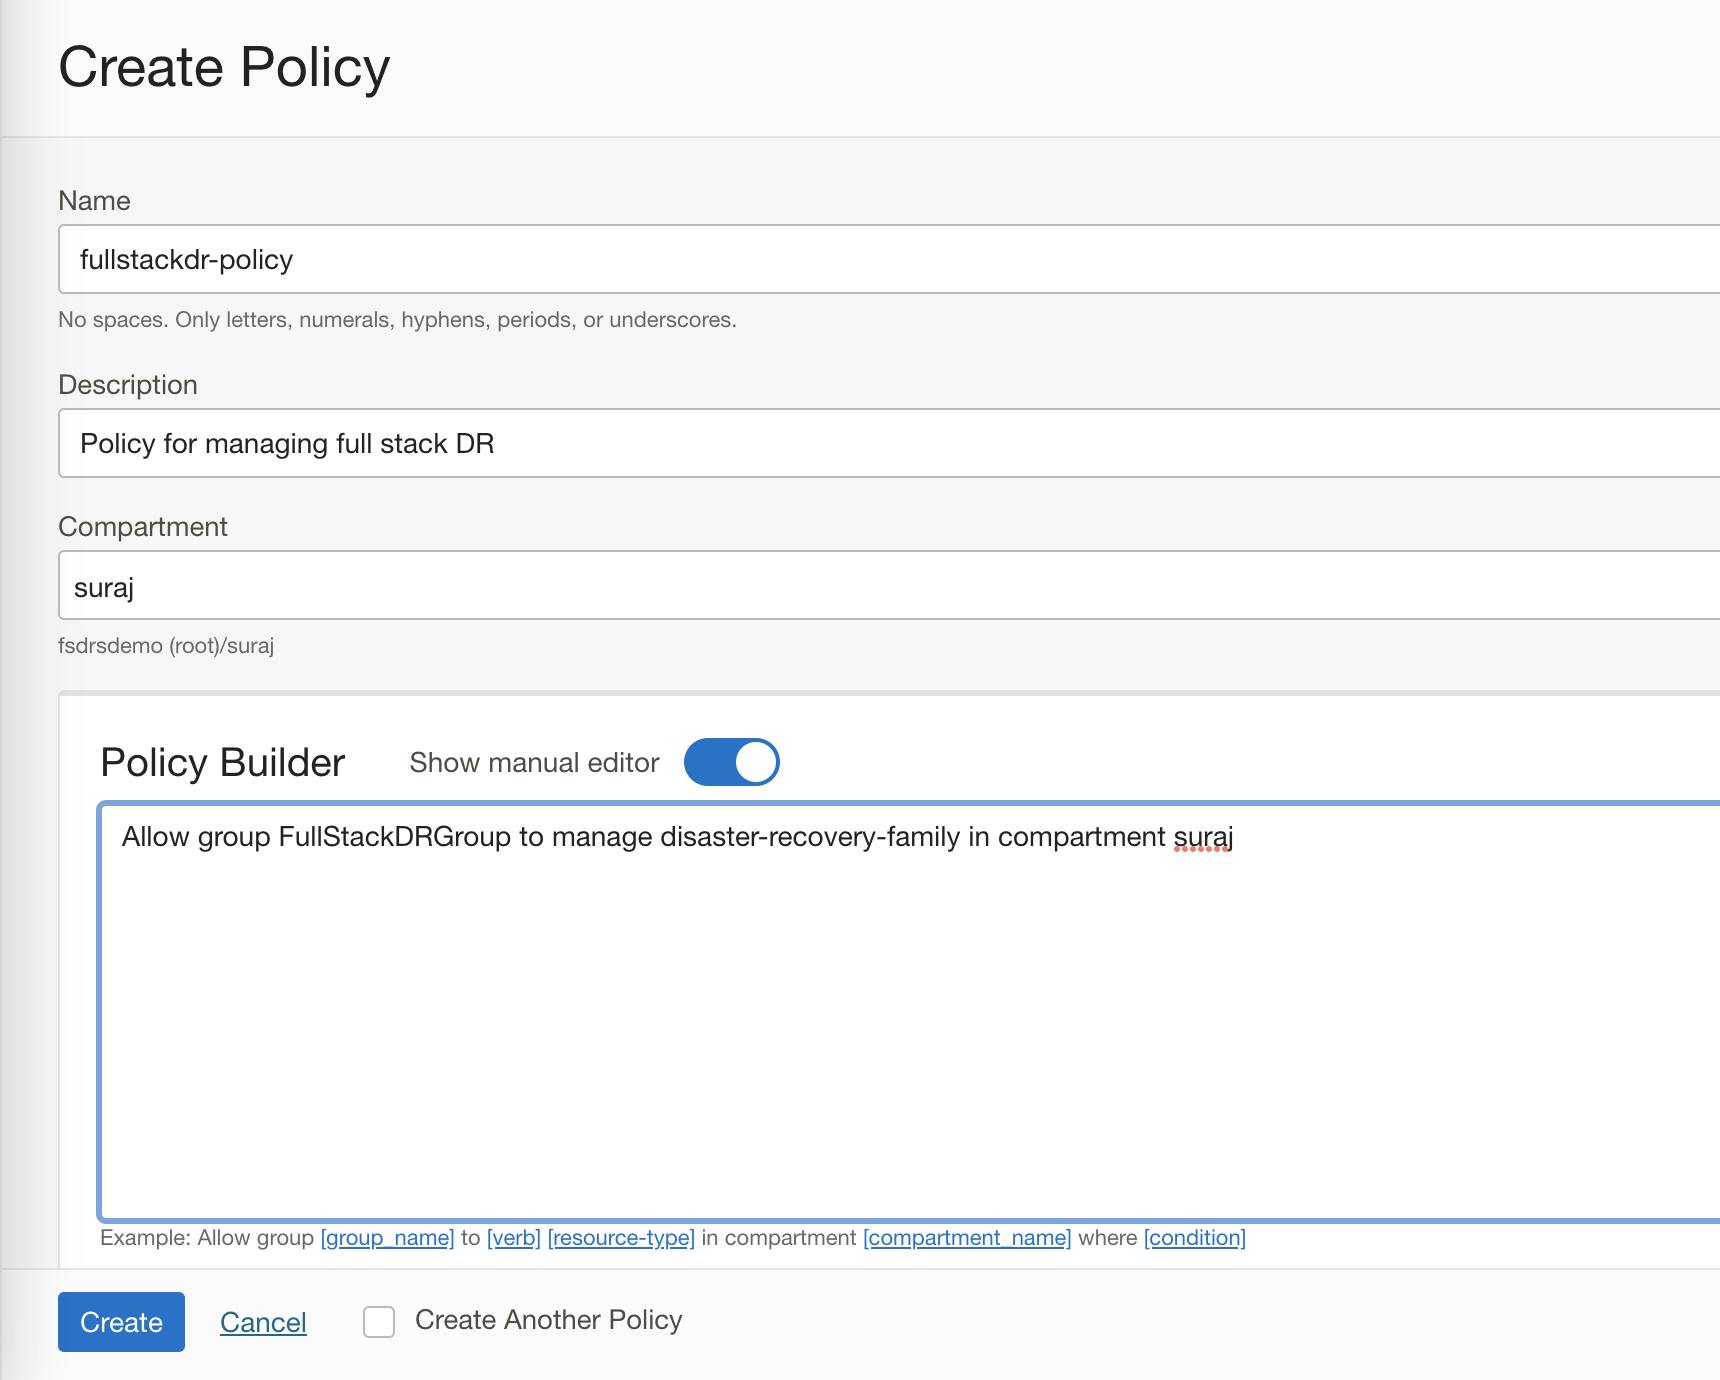
Regarding the Full Stack DR, I have provided manage disaster-recovery-family access. Suppose you need to have granular access to different full stack DR resource types, you can do that.Refer to Full Stack DR policies documentation for more details and modify the policies accordingly.
4. Add policies to access other OCI services
Full Stack DR implements DR workflows by managing other OCI resources such as Compute, Database, Block Storage, Object Storage, Functions,Vault, Virtual Cloud Network, and more.
We are going to add these below policies to the policy "fullstackdr-policy" created in step 3.
Allow group FullStackDRGroup to manage buckets in compartment suraj
Allow group FullStackDRGroup to manage objects in compartment suraj
Allow group FullStackDRGroup to manage databases in compartment suraj
Allow group FullStackDRGroup to manage autonomous-databases in compartment suraj
Allow group FullStackDRGroup to manage instance-family in compartment suraj
Allow group FullStackDRGroup to manage instance-agent-command-family in compartment suraj
Allow group FullStackDRGroup to manage volume-family in compartment suraj
Allow group FullStackDRGroup to read virtual-network-family in compartment suraj
Allow group FullStackDRGroup to use subnets in compartment suraj
Allow group FullStackDRGroup to use vnics in compartment suraj
Allow group FullStackDRGroup to use network-security-groups in compartment suraj
Allow group FullStackDRGroup to use private-ips in compartment suraj
Allow group FullStackDRGroup to read fn-app in compartment suraj
Allow group FullStackDRGroup to read fn-function in compartment suraj
Allow group FullStackDRGroup to use fn-invocation in compartment suraj
Allow group FullStackDRGroup use tag-namespaces in compartment suraj
Allow group FullStackDRGroup read vaults in compartment suraj
Allow group FullStackDRGroup read secret-family in compartment suraj
a. Login to the OCI console with administrator credentials and select your home region.
b. From the hamburger menu, navigate to Identity & Security -> Policies->Select the policy created in Step 3-> Select Edit Policy Statements->Policy Builder->Advanced
Copy the list of policies as above and hit save changes. Verify whether all the added policies are reflected correctly.
You should use the correct group name (created in step 2) and compartment name in the policy syntax.
Refer to the complete set of services that currently Full Stack DR has integration with and based on the documentation you can provide restrictive access to other OCI services.
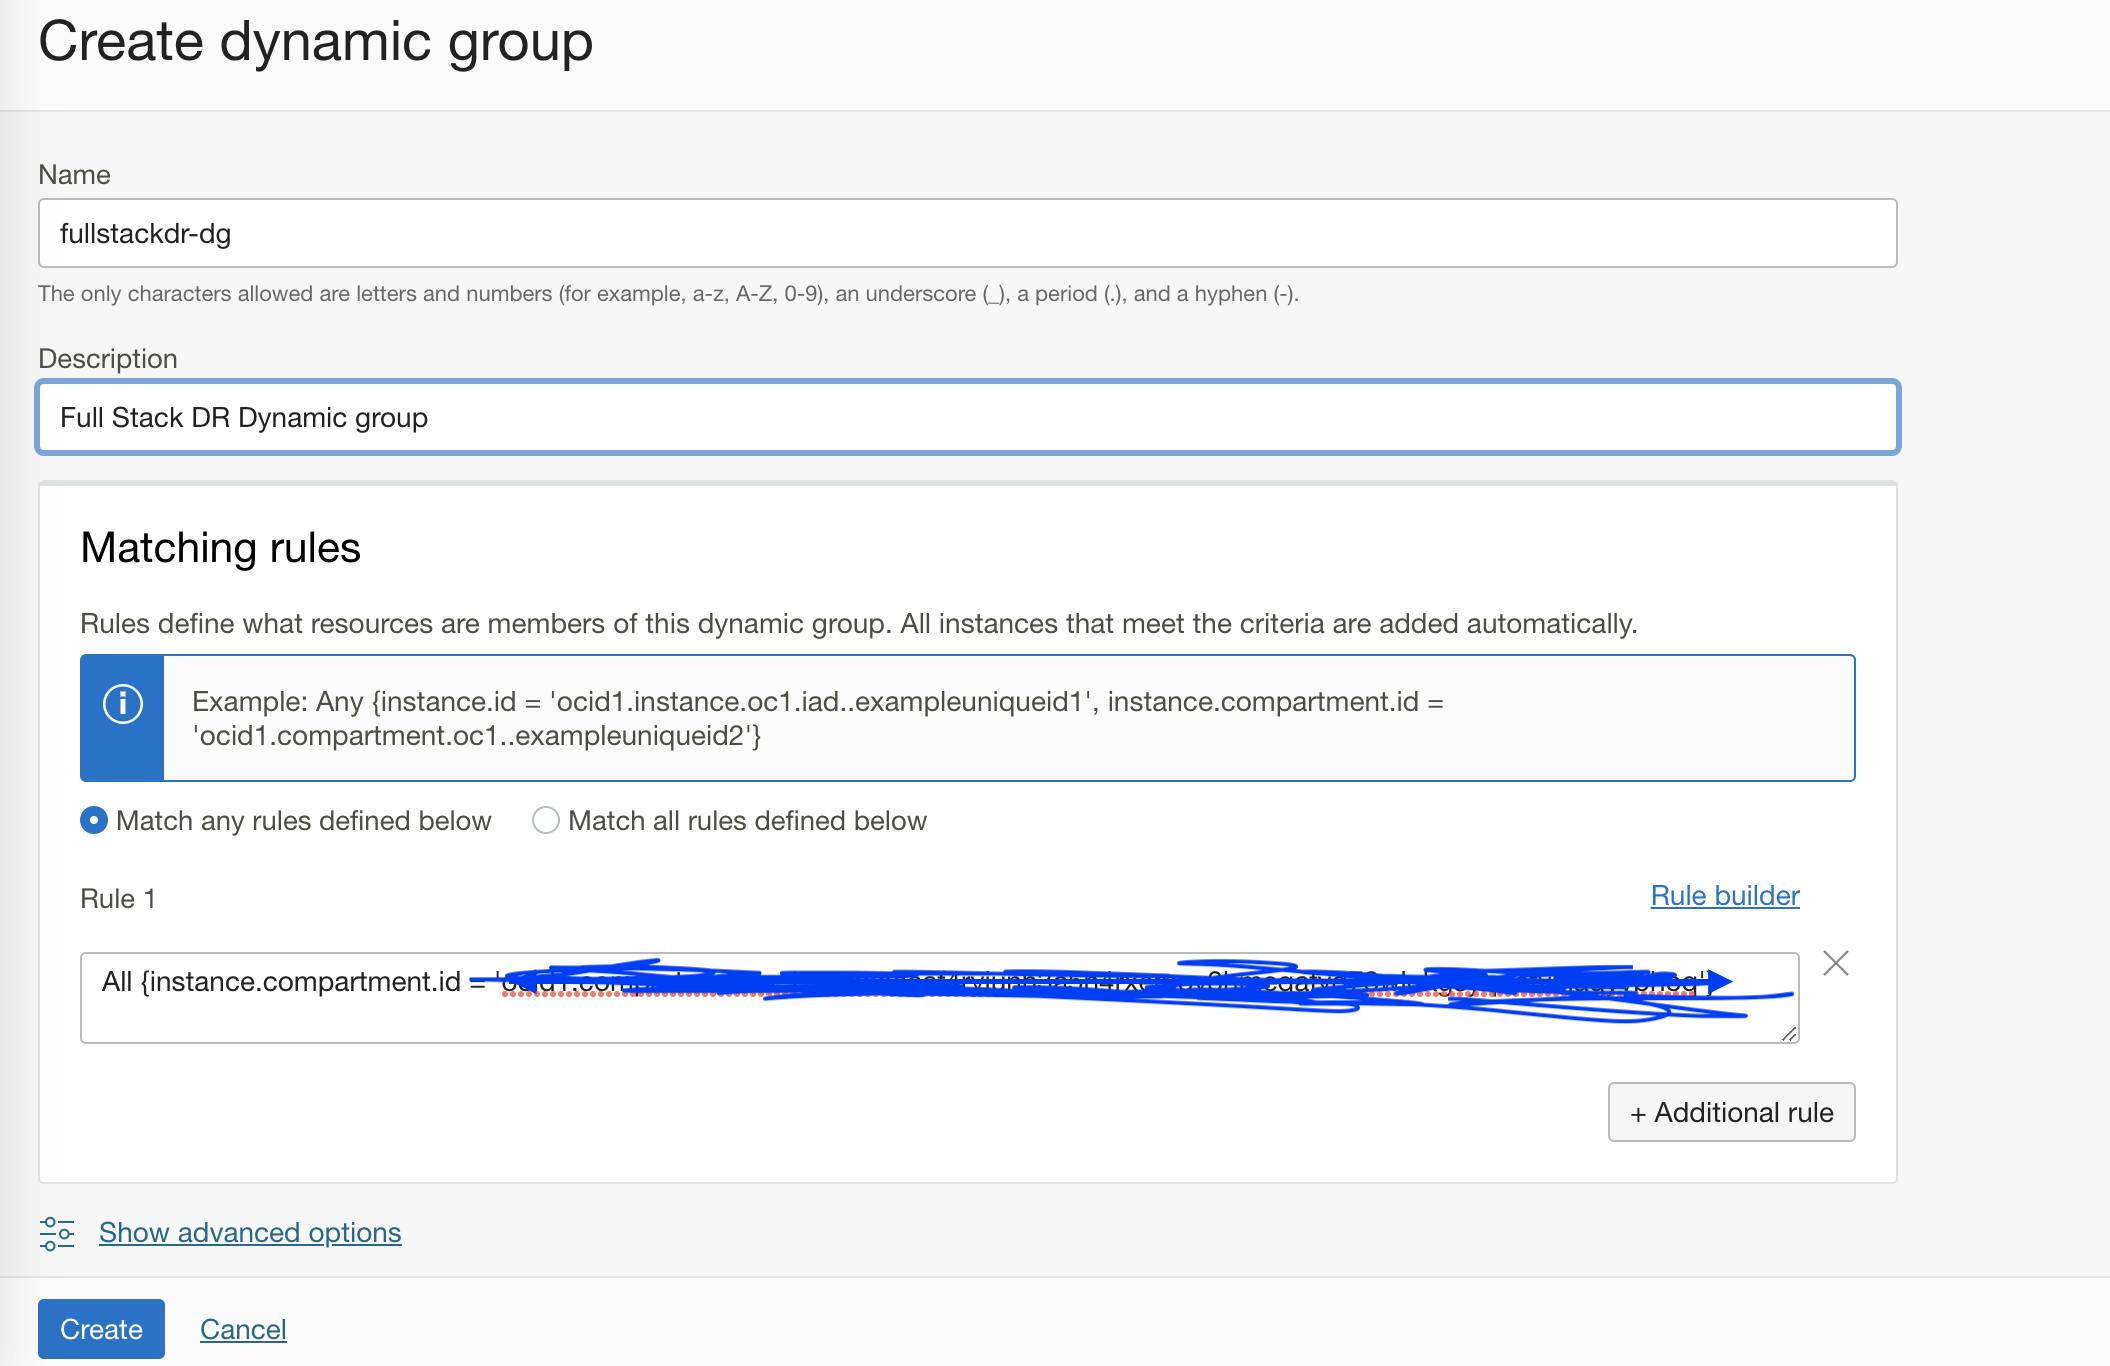
5. Create a Dynamic Group and modify the policy
Full Stack DR has a functionality of a User-Defined Plan group using which you can create steps to execute commands in OCI compute instance. Dynamic groups allow you to group OCI compute instances as "principal" actors (similar to user groups). You can then create policies to permit instances to make API calls against OCI Services.
a. Login to the OCI console with administrator credentials and select your home region.
b.From the hamburger menu, navigate to Identity & Security ->Domains-> Default Domain->Dynamic Groups->Create dynamic group. Provide Name, Description, Matching rules-> Match any rules defined below -> In Rule 1, provide the below details. Make sure you modify your compartment OCID -> Create
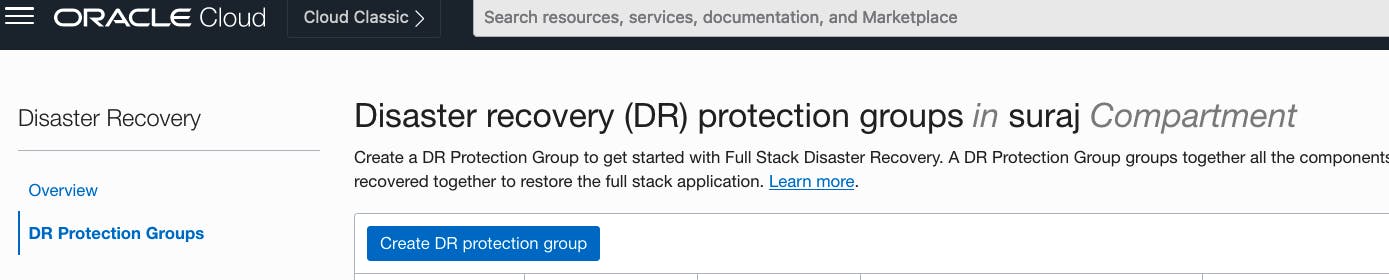
6. Verify Full Stack DR access
Considering now we have set up all the necessary prerequisites, you should be able to login into the OCI console as the user (created in step 1) and verify the Full Stack DR functionality. Make sure you have the necessary user credentials for proceeding further.
a. Login to the OCI console with user credentials and select your home region.
b. From the hamburger menu, navigate to Migration and Disaster Recovery->Disaster Recovery->DR Protection Groups
Now you should be able to Create a DR protection group and start working with the service.
As part of this Blog Series, we will discuss various components in OCI Full Stack DR and multiple use cases with Full Stack DR in upcoming blogs.
Thanks for reading.